Firebase Cluod Messaging (FCM) 앱 구현
FCM이란?
2023.03.13 - [Firebase/Firebase Cloud Messaging] - Firebase Cloud Messaging
Firebase Cloud Messaging
Firebase 클라우드 메시징(FCM) 메시지를 안정적으로 무료 전송할 수 있는 크로스 플랫폼 메시징 솔루션 알림 메시지를 전송하여 사용자를 유지하고 재참여를 유도 https://youtu.be/sioEY4tWmLI?list=PLl-K7zZE
holy-season.tistory.com
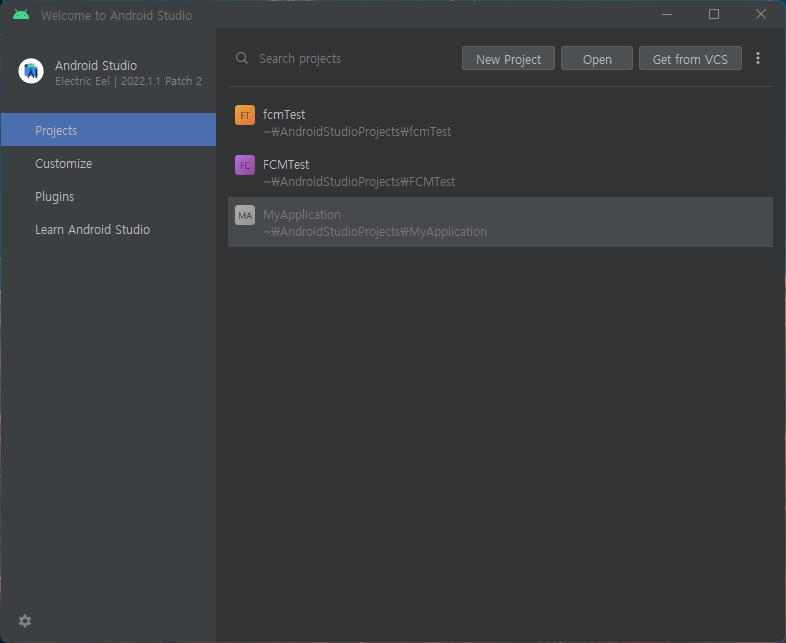
Android Project 생성
Android Project를 생성하기 전에 먼저 Firebase에 Android 앱을 추가해야 한다.
2023.03.14 - [Firebase] - Firebase Android 앱 추가
Firebase Android 앱 추가
Firebase에 Android 앱 추가 다음과 같이 빨간 네모 박스 안에 있는 Android 앱을 추가한다. Android 앱에 Firebase 추가 Android 패키지 이름을 설정하고 앱 등록을 클릭한다. 구성 파일을 다운로드 하고 안드
holy-season.tistory.com
Android Studio를 열고 New Project를 클릭해 새로운 프로젝트를 생성한다.
Empty Activity를 선택하고 Next 버튼을 클릭해 다음 화면으로 넘어간다.

파이어 베이스에 등록한 앱 패키지 명과 동일하게 package name을 설정한 후 Finish 버튼을 눌러 설정을 완료한다.

안드로이드 Firebase SDK 추가
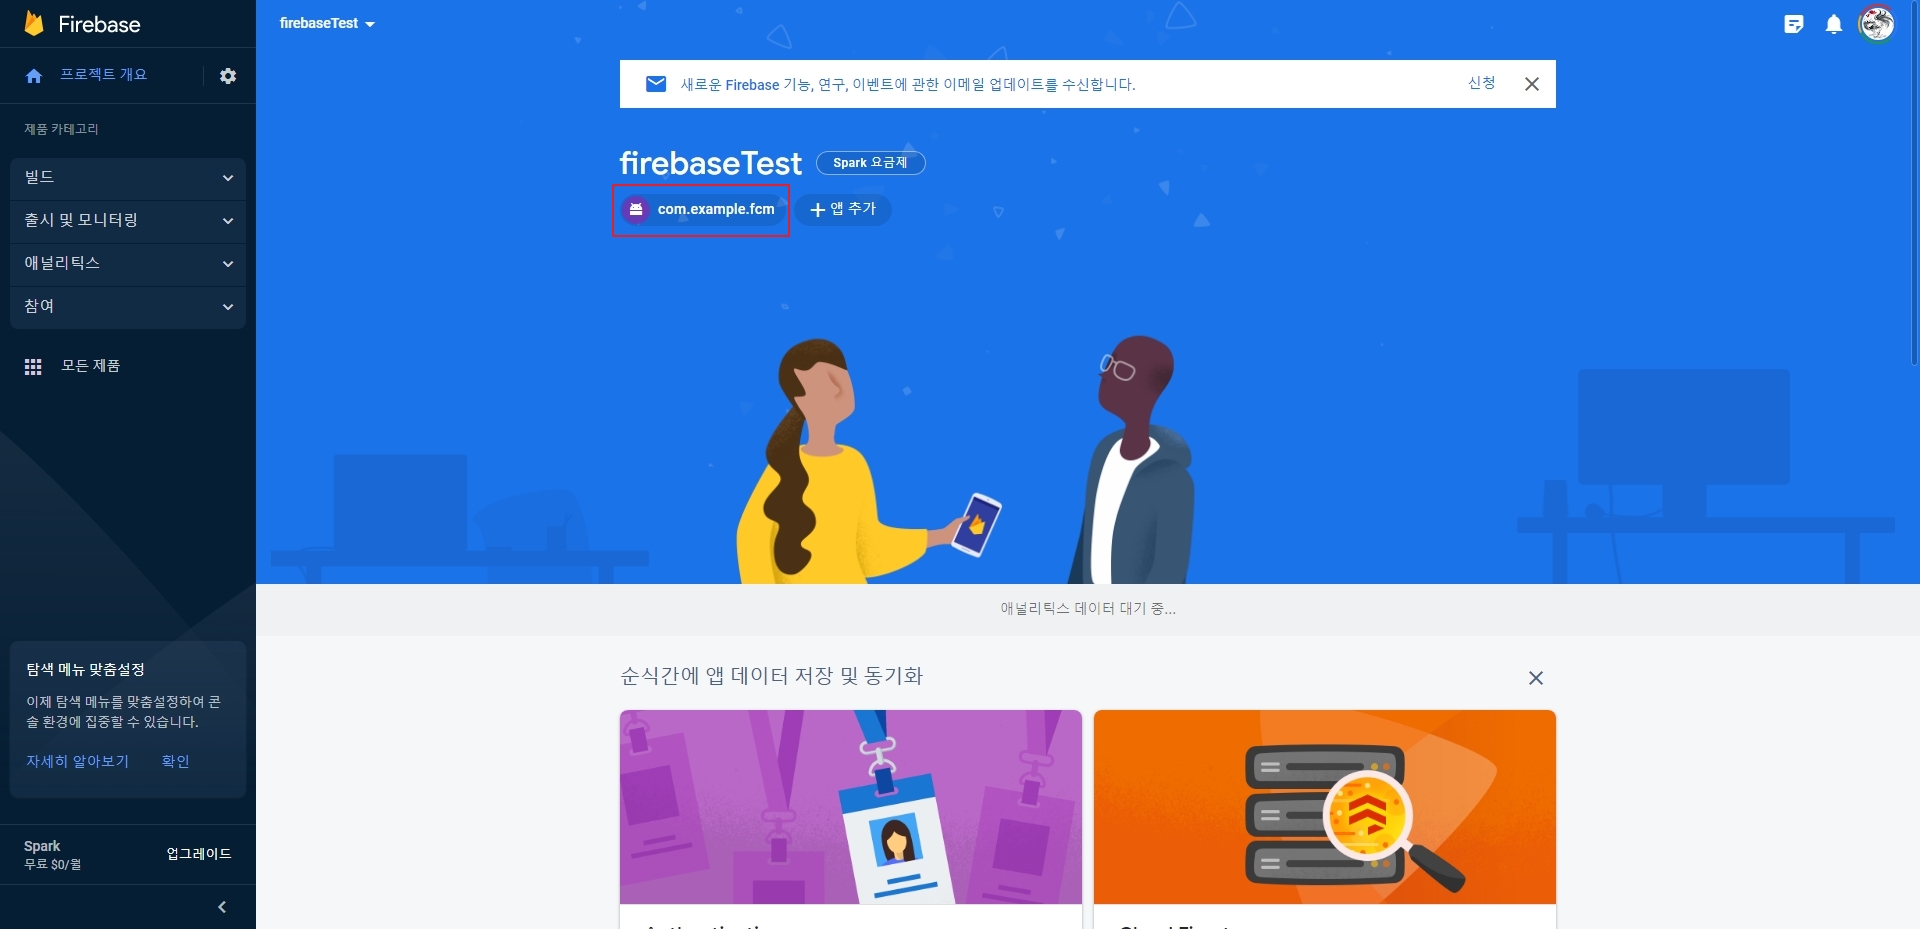
빨간 네모 박스 안에 com.example.fcm을 클릭하고 톱니바퀴 모양을 눌러 프로젝트 설정으로 이동한다.

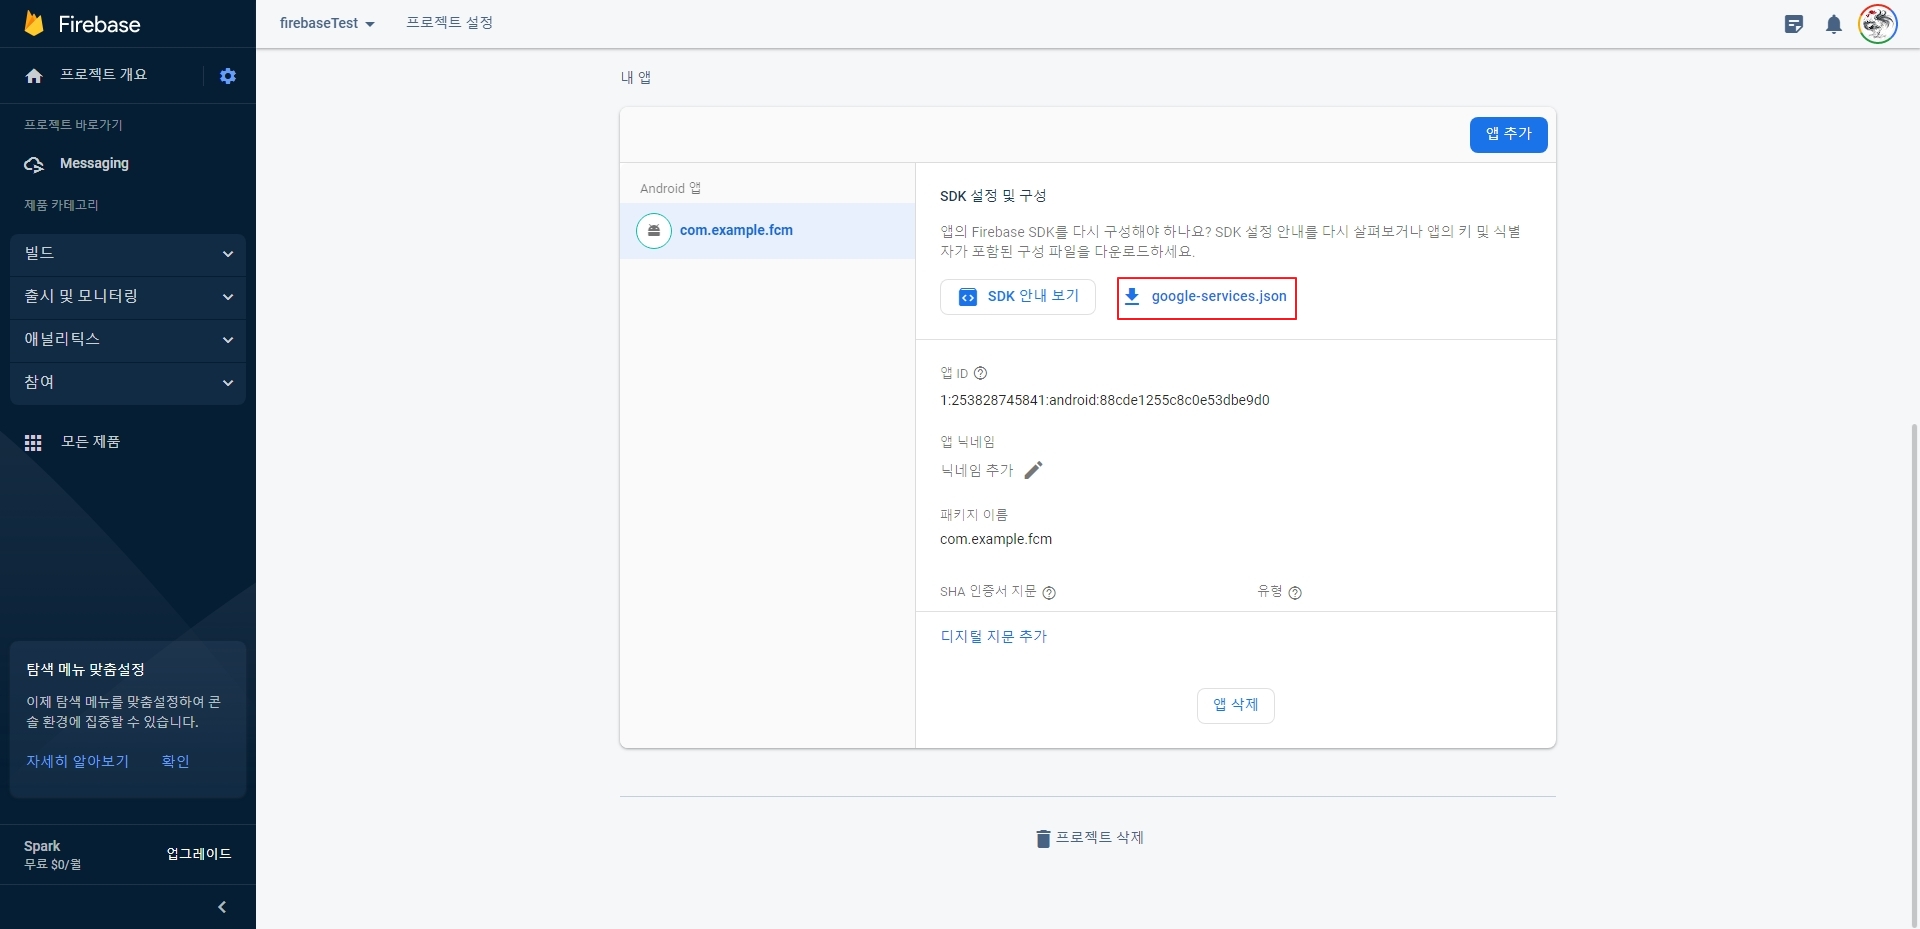
프로젝트 설정에서 화면을 아래로 스크롤 하면 내 앱이 나오는데 google-service.json을 클릭해서 다운로드 한다.
Android 탭을 클릭하고 Project로 바꾼 후 다운 받은 google-service.json을 app 폴더에 넣는다


프로젝트 수준의 build.gradle에 buildscript를 추가한다.
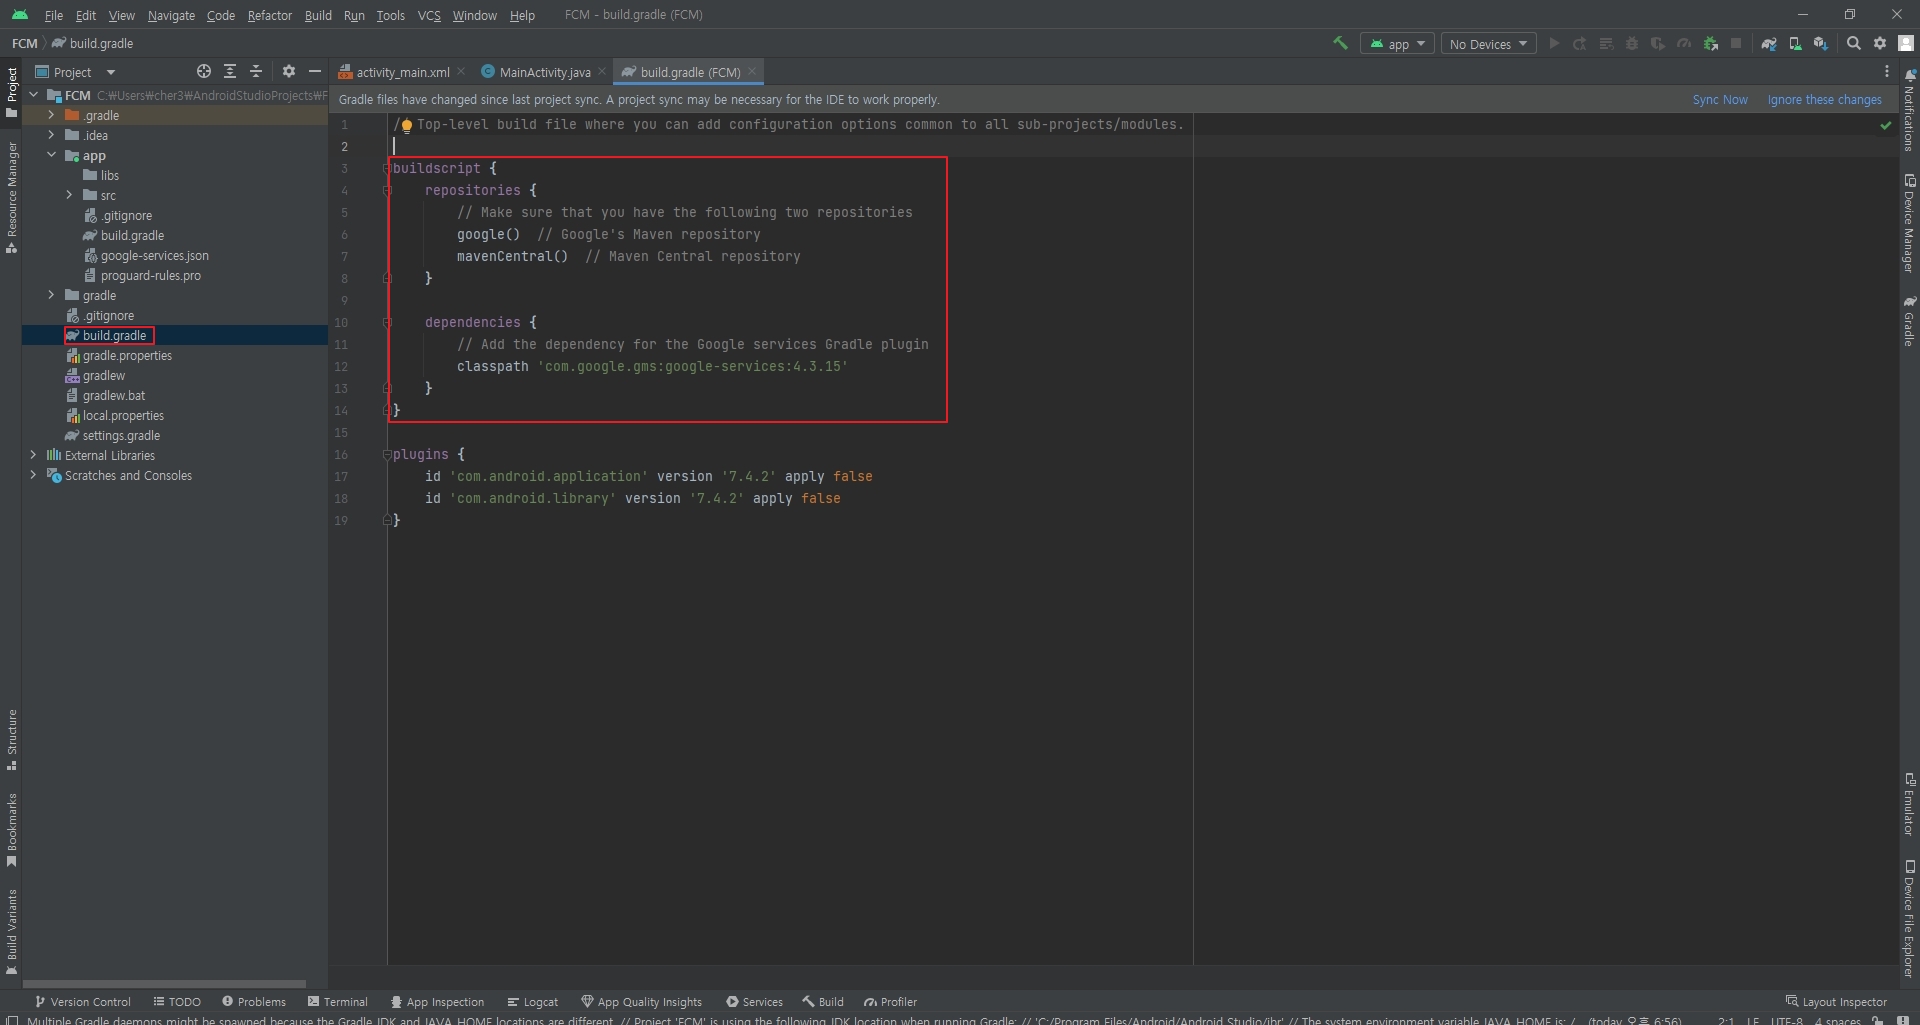
buildscript {
    repositories {
        // Make sure that you have the following two repositories
        google()  // Google's Maven repository
        mavenCentral()  // Maven Central repository
    }

    dependencies {
        // Add the dependency for the Google services Gradle plugin
        classpath 'com.google.gms:google-services:4.3.15'
    }
}
앱 수준 build.gradle파일에 plugins에 Google 서비스 플러그인을 추가한다.

id 'com.google.gms.google-services'
dependencies에 Firebase BoM, Google Analytics, Cloud Messaging을 추가한다.

	// Import the Firebase BoM
	implementation platform('com.google.firebase:firebase-bom:31.2.2')
	// Add the dependency for the Firebase SDK for Google Analytics
	implementation 'com.google.firebase:firebase-analytics'
	// Add the dependency for the Firebase SDK for Cloud Messaging
	implementation 'com.google.firebase:firebase-messaging'
사용 가능한 라이브러리 목록
오른쪽 탭에 Gradle 버튼을 누르고 프로젝트명에 우클릭을 한 다음 Reload Gradle Project를 눌러 동기화한다.

안드로이드 FCM을 위한 로직 구현
Android 뷰로 바꾸고 com.example.fcm(패키지)에 MyFirebaseMessagingService를 생성한다.

MyFirebaseMessagingService에 FirebaseMessagingService를 상속하고 토큰이 생성될때 실행되는 onNewToken메서드를 오버라이드 한다.

package com.example.fcm;

import android.util.Log;

import androidx.annotation.NonNull;

import com.google.firebase.messaging.FirebaseMessagingService;

public class MyFirebaseMessagingService extends FirebaseMessagingService {
    @Override
    public void onNewToken(@NonNull String token) {
        Log.d("Refreshed Token", token);
    }
}
MainActivity에서 Firebase 서버에 등록된 토큰을 가져오는 로직을 추가한다.

package com.example.fcm;

import androidx.annotation.NonNull;
import androidx.appcompat.app.AppCompatActivity;

import android.os.Bundle;
import android.util.Log;

import com.google.android.gms.tasks.OnCompleteListener;
import com.google.android.gms.tasks.Task;
import com.google.firebase.messaging.FirebaseMessaging;

public class MainActivity extends AppCompatActivity {

    @Override
    protected void onCreate(Bundle savedInstanceState) {
        super.onCreate(savedInstanceState);
        setContentView(R.layout.activity_main);

        FirebaseMessaging.getInstance().getToken().addOnCompleteListener(new OnCompleteListener<String>() {
            @Override
            public void onComplete(@NonNull Task<String> task) {
                if(!task.isSuccessful()) {
                    Log.w("Failed", "Fetching FCM registration token failed", task.getException());
                    return;
                }

                Log.d("Device Token", task.getResult());
            }
        });
    }
}
안드로이드 Manifest 수정
Manifest에 생성한 클래스를 확장하는 서비스를 만든다.

<?xml version="1.0" encoding="utf-8"?>
<manifest xmlns:android="http://schemas.android.com/apk/res/android"
    xmlns:tools="http://schemas.android.com/tools">

    <application
        android:allowBackup="true"
        android:dataExtractionRules="@xml/data_extraction_rules"
        android:fullBackupContent="@xml/backup_rules"
        android:icon="@mipmap/ic_launcher"
        android:label="@string/app_name"
        android:supportsRtl="true"
        android:theme="@style/Theme.FCM"
        tools:targetApi="31">
        <activity
            android:name=".MainActivity"
            android:exported="true">
            <intent-filter>
                <action android:name="android.intent.action.MAIN" />

                <category android:name="android.intent.category.LAUNCHER" />
            </intent-filter>
        </activity>

        <service android:name=".MyFirebaseMessagingService" android:exported="false">
            <intent-filter>
                <action android:name="com.google.firebase.MESSAGING_EVENT" />
            </intent-filter>
        </service>

    </application>

</manifest>
안드로이드 13 이상일 경우
AndroidManifest 수정
런타임 알림 권한을 요청하기 위해 <uses-permision>태그에 POST_NOTIFICATIONS를 추가한다.

<uses-permission android:name="android.permission.POST_NOTIFICATIONS"/>MainActivity 수정
askNotificationPermission 메서드와 requestPermissionLauncher 메서드를 추가한다.
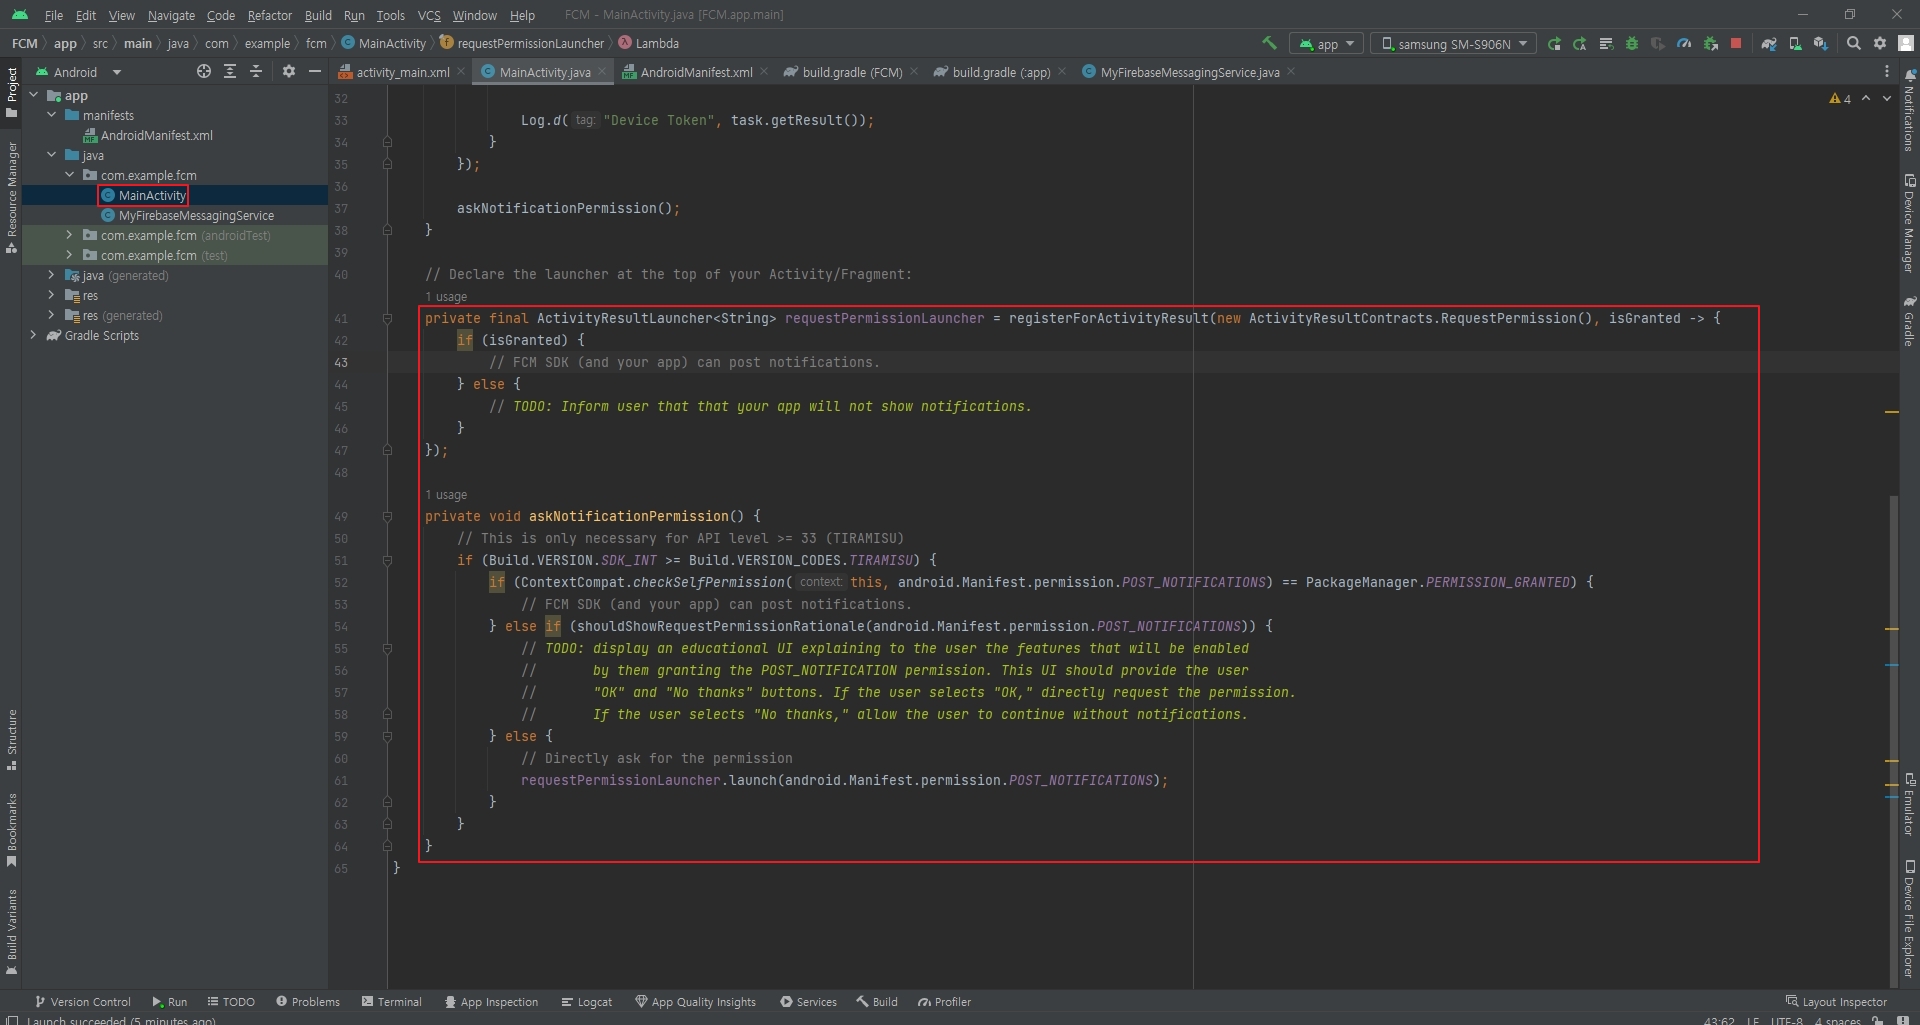
    private final ActivityResultLauncher<String> requestPermissionLauncher = registerForActivityResult(new ActivityResultContracts.RequestPermission(), isGranted -> {
        if (isGranted) {
            // FCM SDK (and your app) can post notifications.
        } else {
            // TODO: Inform user that that your app will not show notifications.
        }
    });

    private void askNotificationPermission() {
        // This is only necessary for API level >= 33 (TIRAMISU)
        if (Build.VERSION.SDK_INT >= Build.VERSION_CODES.TIRAMISU) {
            if (ContextCompat.checkSelfPermission(this, android.Manifest.permission.POST_NOTIFICATIONS) == PackageManager.PERMISSION_GRANTED) {
                // FCM SDK (and your app) can post notifications.
            } else if (shouldShowRequestPermissionRationale(android.Manifest.permission.POST_NOTIFICATIONS)) {
                // TODO: display an educational UI explaining to the user the features that will be enabled
                //       by them granting the POST_NOTIFICATION permission. This UI should provide the user
                //       "OK" and "No thanks" buttons. If the user selects "OK," directly request the permission.
                //       If the user selects "No thanks," allow the user to continue without notifications.
            } else {
                // Directly ask for the permission
                requestPermissionLauncher.launch(android.Manifest.permission.POST_NOTIFICATIONS);
            }
        }
    }
onCreate 메서드 안에 asNotificationPermission 메서드를 호출한다.

안드로이드 앱 빌드
앱을 설치하고 싶은 기기를 선택하고 빌드한다.

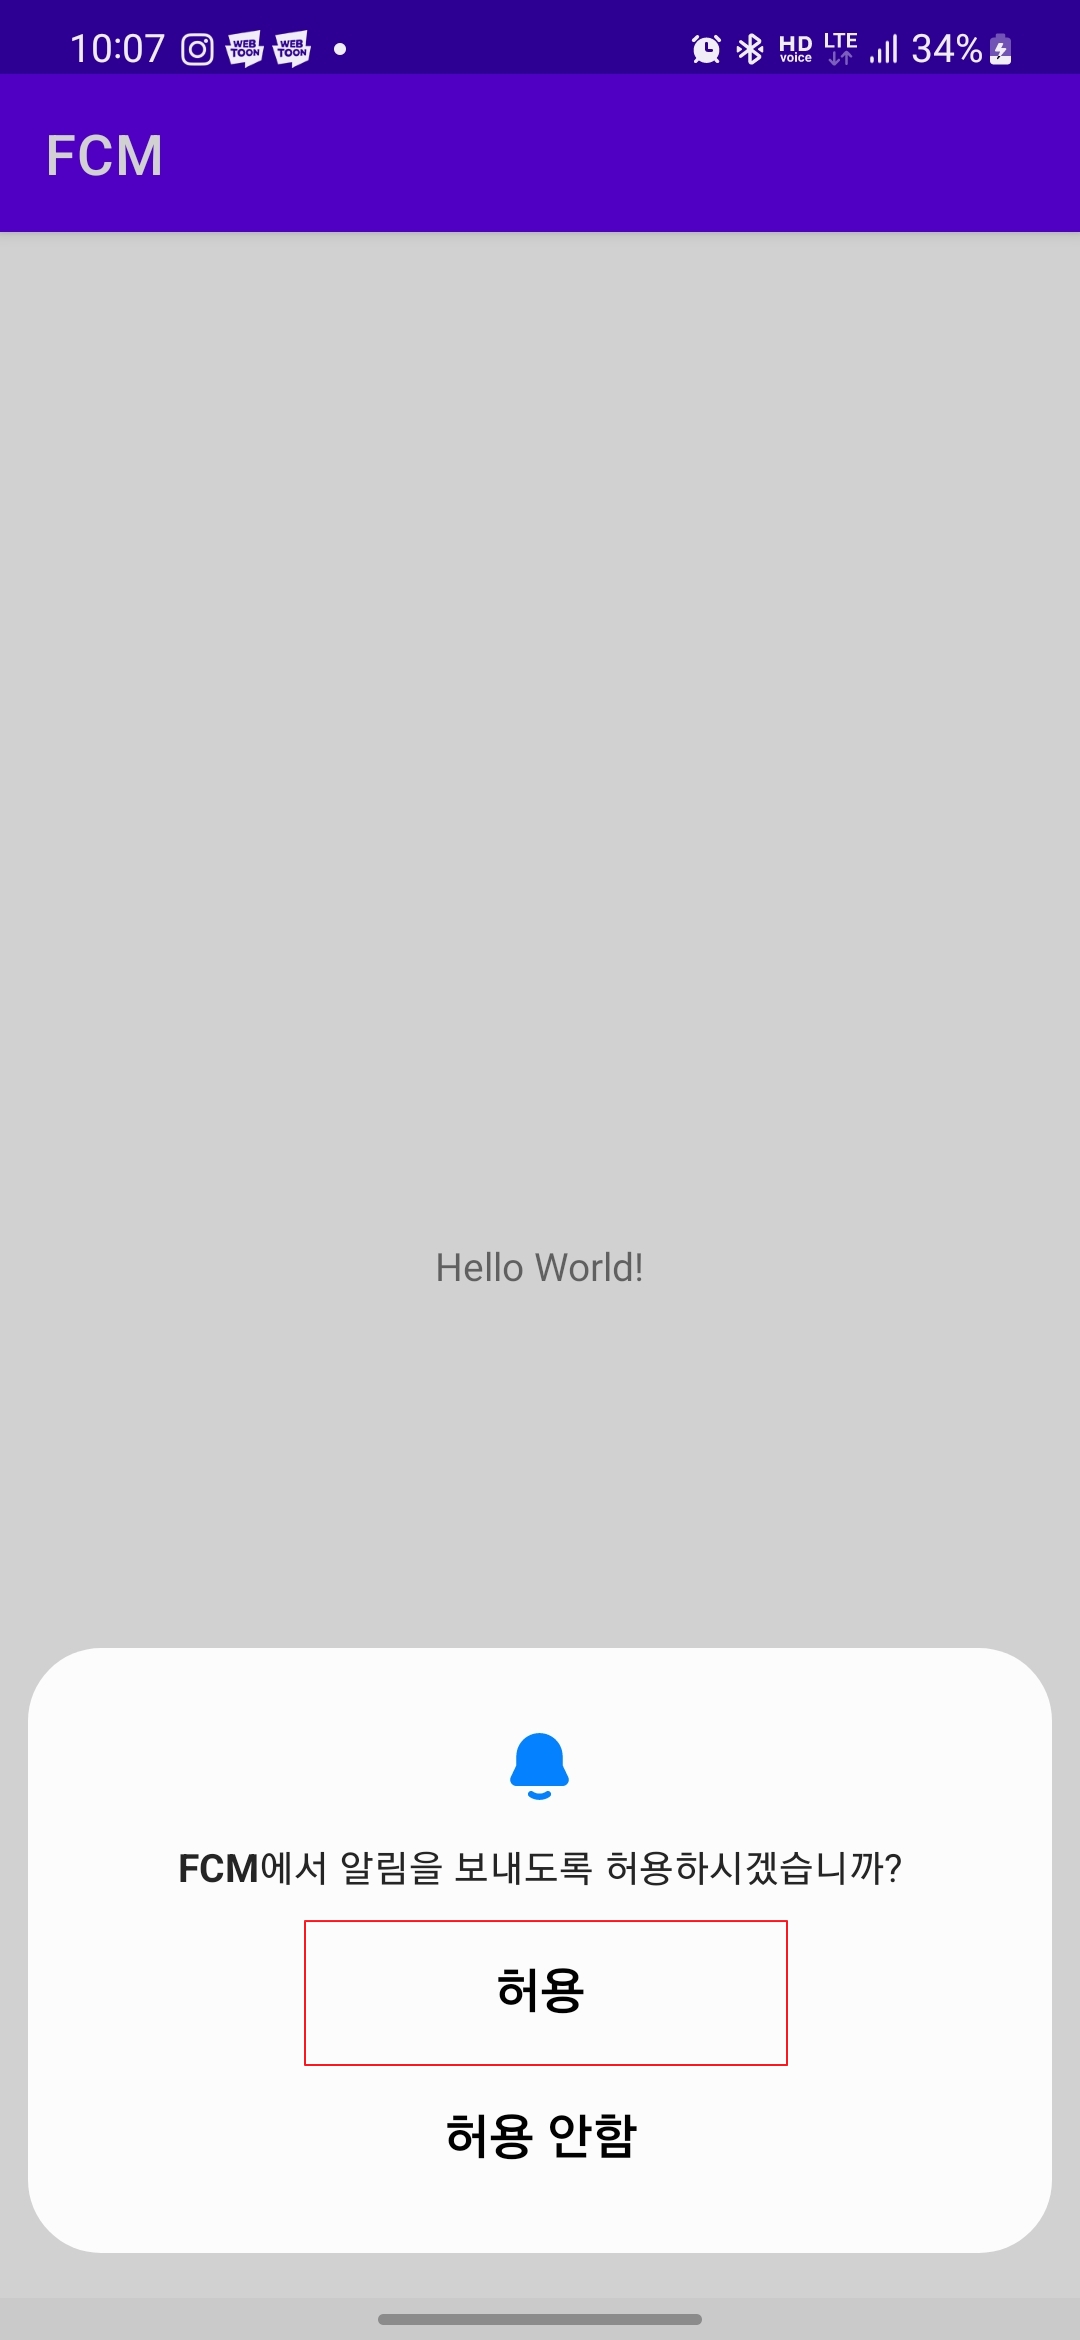
안드로이드 앱 화면
허용을 선택하고 바탕화면으로 이동한다.
Token 확인
Logcat으로 이동해 Device Token을 확인하고 값을 복사한다.

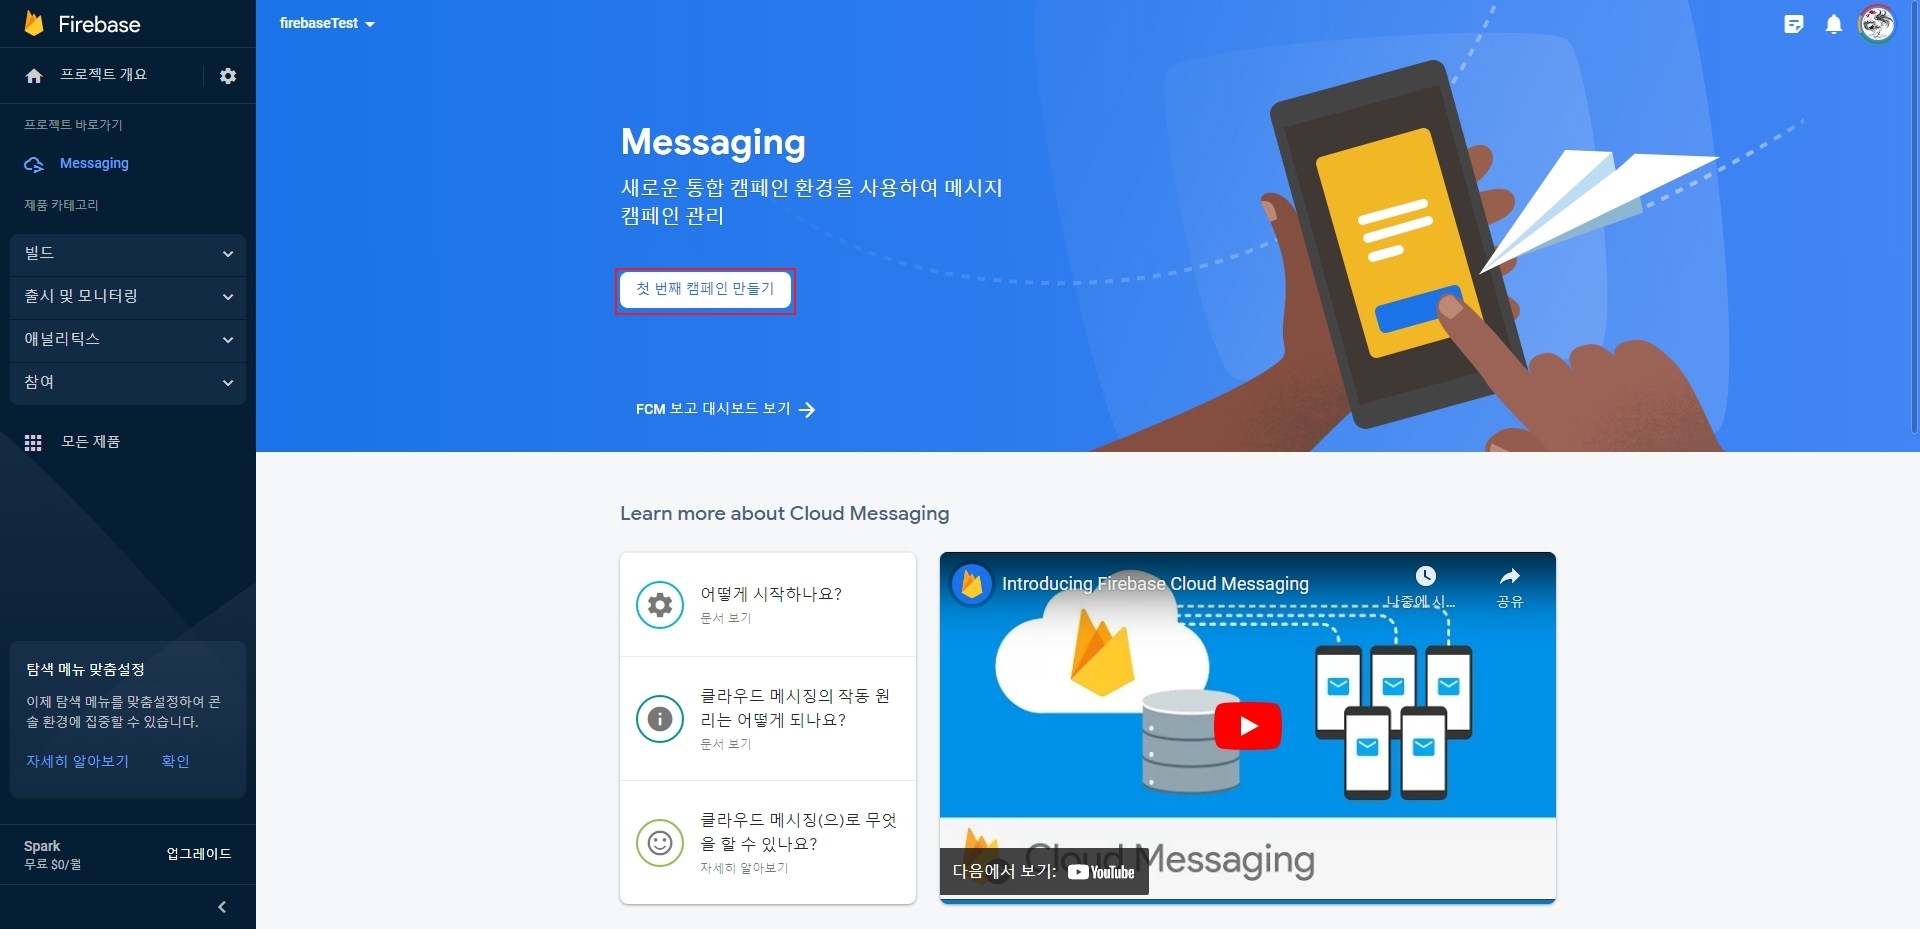
Firebase Console 에서 알림 메시지 보내기
만들어 두었던 파이어베이스 프로젝트로 이동한 후 참여탭에 Messging을 선택해 이동한다.

첫 번째 캠페인 만들기를 클릭하고 이동한다.
메시지 유형 및 플랫폼에서 Firebase 알림 메시지를 선택한후 만들기를 눌러 이동한다.

알림 제목과 알림 텍스트를 설정하고 테스트 메시지 전송을 눌러 다음 화면으로 이동한다.

FCM 등록 토큰 추가에 복사해 두었던 Device Token값을 붙여넣는다.


+ 버튼이나 엔터를 눌러 토큰을 추가한 후 테스트 버튼을 눌러 테스트 한다.

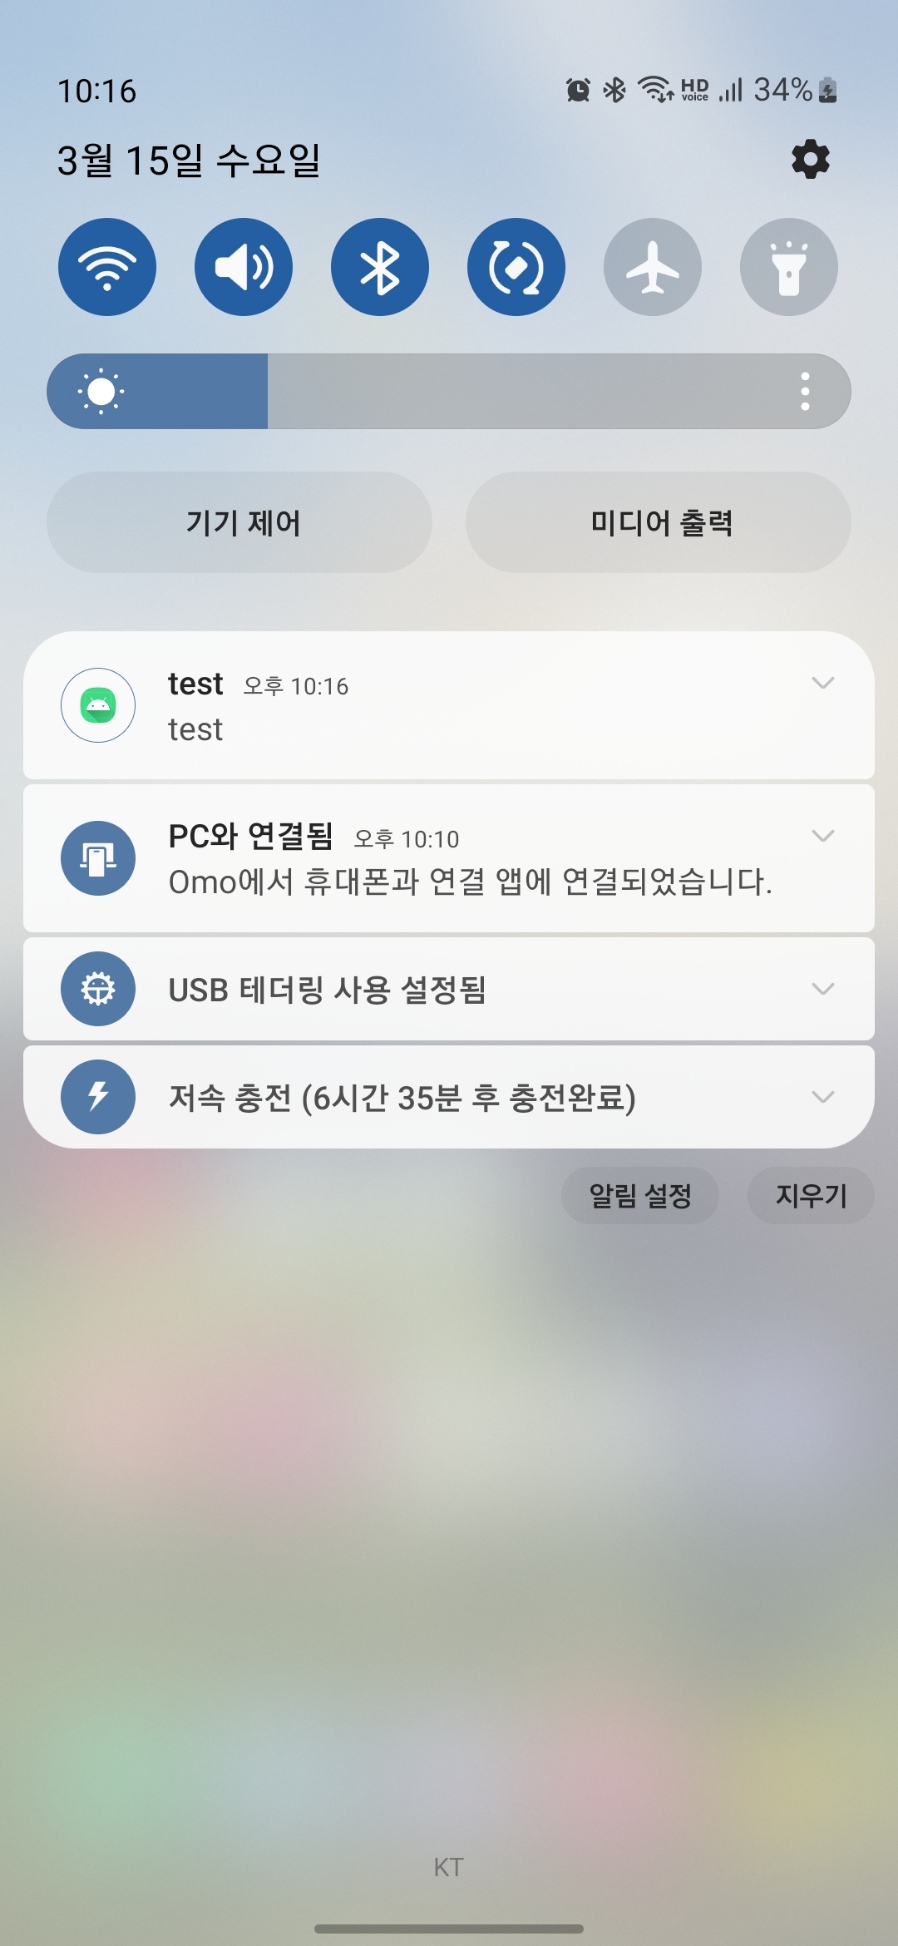
안드로이드 테스트 화면
알림 메시지가 왔으면 성공
Device Token 값이 변경될 수 도 있으니 다시 한번 확인해 보는것이 좋다.
'Android' 카테고리의 다른 글
| 전체 화면 설정 (0) | 2023.04.21 |
|---|---|
| RecyclerView 만들기 (0) | 2023.04.18 |
| RecyclerView (0) | 2023.04.16 |
| VideoView로 동영상 재생하기 (0) | 2023.04.12 |
| Android RTSP 영상 재생하기 (0) | 2023.04.11 |


